
Metal Bandsaw Troubleshooting
How to Diagnose and Fix the Most Common Cutting Problems
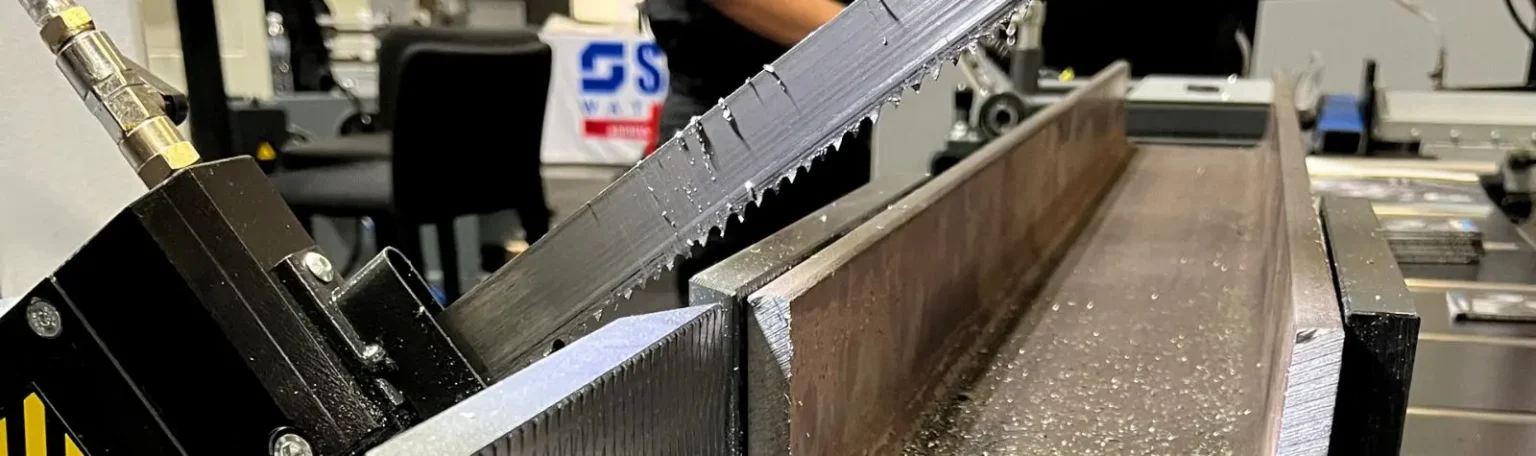
A metal bandsaw that’s set up correctly should cut square, quietly and consistently for years. When it doesn’t, the temptation is to blame the blade and throw a new one on – but in most workshops, the blade is the symptom, not the cause. Fit a fresh blade to a saw with a tracking fault, worn guides or the wrong feed settings and you’ll destroy it just as quickly as the last one.
The good news is that most bandsaw problems trace back to a handful of causes, and nearly all of them can be diagnosed in the workshop with basic tools. This guide works through the most common issues we see on horizontal and vertical metal bandsaws across Australia — what the symptoms look like, what’s actually causing them, and how to fix them.
Start With the Symptom, Not the Saw
Before adjusting anything, take note of exactly what the saw is doing wrong. Different faults leave different fingerprints:
- Cuts wandering off square (out of vertical or drifting sideways) – usually tension, tracking or guide wear
- Blade squealing or chattering – often blade speed, pitch selection or vibration in the material clamping
- Teeth stripping off the blade – almost always the wrong tooth pitch for the material, or excessive feed pressure
- Blades breaking early or cracking at the gullets – over-tensioning, worn wheels, or running the blade too hard without coolant
- Discoloured, blued chips – feed rate, blade speed or lubrication problems generating too much heat
Matching the symptom to the likely cause saves you from adjusting five things at once and never knowing which one fixed it. Work through the sections below in order, each one builds on the last, and the sequence matters.
1. Check Blade Tension and Tracking First
Tension and tracking are the foundation of everything else, so always start here. A blade that isn’t tensioned and tracking correctly will cut crooked no matter how sharp it is or how well the guides are set.
Tension. An under-tensioned blade flexes in the cut, which is the number-one cause of bowed or bellied cuts in solid bar. An over-tensioned blade puts unnecessary strain on the blade body, the wheel bearings and the tensioning mechanism, and shortens the life of all three. Check your machine manual for the recommended tension for your blade width — larger industrial saws often specify tension in PSI on a gauge, while smaller machines rely on a calibrated scale or the manufacturer’s turn settings. If your saw has neither, a blade tension gauge is an inexpensive addition that removes the guesswork.
Two habits make a real difference here:
- Re-check tension after fitting a new blade and again after the first few cuts. New blades bed in and lose a small amount of tension early in their life.
- De-tension the blade if the saw will sit unused for extended periods. Leaving a blade at full working tension around the clock flat-spots wheels and fatigues the blade.
Tracking. With tension set, the blade should run in a consistent position on the wheels — check your manual, as the correct position varies between machines with crowned and flat wheels. If the blade wanders forward and back on the wheel, or rides hard against the wheel flange, adjust the tracking control (usually a tilt adjustment on the idler wheel) in small increments with the blade running at low speed and the guards in place. Poor tracking accelerates guide wear and causes the blade to twist in the cut.
If tracking won’t hold adjustment, look for the underlying cause: worn wheel tyres, chips packed onto the wheel surface, or a bent wheel shaft. These are the point where a service call becomes more economical than continued trial and error.
Wrong Blade Type. The blade itself can be the reason a saw won’t cut straight, even with tension and tracking set perfectly.
Inferior quality blades are a false economy. cheap blades are made from softer steel with inconsistent tooth set and weld quality, so they dull quickly, wander in the cut and break early. A quality bi-metal blade from a reputable manufacturer costs more upfront and considerably less per cut.
The other blade-related cause of wandering is running the wrong pitch for the material: when the tooth pitch is too fine, the gullets can’t clear the swarf being produced, the teeth clog up with packed chips, and the loaded-up blade stops cutting cleanly and starts steering off line instead. If your cuts wander and the blade teeth are visibly packed with material, the blade is wrong for the job. pitch selection is covered in detail in section 4 below.
2. Inspect Blade Guides & Replace when Worn
Blade guides do exactly what the name says: they hold the blade square and rigid through the cut zone. On most metal bandsaws these are either carbide pads, roller bearings, or a combination of both, mounted on the guide arms either side of the workpiece.
Guides are wear items. Carbide pads develop grooves, rollers develop flat spots and slop in their bearings, and once that happens the blade is free to twist and deflect — which shows up as cuts that start square and drift as they go deeper.
How to check them:
- Isolate the machine and remove the blade.
- Inspect carbide pads for visible grooving or uneven wear. Any groove deep enough to catch a fingernail means the pad needs rotating (if your design allows it) or replacing.
- Spin each guide roller by hand. It should turn freely with no roughness, and there should be no radial play in the bearing.
- Refit the blade and set the guide clearance to the manufacturer’s specification, typically only a few hundredths of a millimetre either side of the blade. Guides set too loose don’t support the blade; guides clamped hard against it generate heat and wear both surfaces rapidly.
- Position the guide arms as close to the workpiece as the job allows. Every extra millimetre of unsupported blade between the guides and the material reduces cutting accuracy.
A set of guide pads costs a fraction of what you’ll spend on blades if you keep cutting with worn ones. If your cuts are out of square and tension and tracking check out, worn guides are the most likely culprit.
3. Get Feed Rate and Blade Speed Right - This Matters More Than Most Operators Realise
Feed rate and blade speed are where good bandsaw practice is won or lost, and they’re the settings most often left wherever the last operator put them.
Blade speed (measured in metres per minute) needs to match the material. As a general guide: mild steel cuts happily at moderate speeds; stainless steel and other work-hardening alloys need slower speeds to avoid hardening the cut face; aluminium and other non-ferrous materials tolerate much higher speeds. Run the blade too fast for the material and you generate heat faster than the coolant can remove it; the tooth tips soften, dull and the blade dies early. Run it too slow and you’re simply giving away productivity.
Feed rate determines how hard each tooth bites. The best indicator isn’t a number on a dial, it’s the chips coming off the cut:
- Thin, powdery chips – feed pressure too light. The teeth are rubbing rather than cutting, which glazes and dulls them.
- Tightly curled, silvery chips – about right. This is what you’re aiming for on steel.
- Thick, heavy or blued chips – feeding too hard, or the blade speed is wrong for the material. Blue chips mean the heat is going into the blade and the workpiece rather than out with the swarf.
Get in the habit of glancing at the chips on every job. It’s the fastest health check a bandsaw offers, and it tells you about speed, feed and blade condition all at once.
One more point that catches people out: new blades need breaking in. Run the first 10–15 minutes of cutting at roughly half your normal feed pressure. This hones the razor-sharp tooth edges gradually instead of chipping them, and can add significantly to overall blade life.
4. Match the Blade Pitch to the Material - the Mistake That Kills More Blades Than Any Other
If you’ve ever stripped a row of teeth off a nearly new blade, the pitch was almost certainly wrong for the job. Tooth pitch, measured in teeth per inch (TPI), has to suit the cross-section of the material, and the rule is simple:
Keep a minimum of three teeth in the cut at all times, and ideally no more than about twenty-four.
- Too coarse a pitch on thin material (tube, angle, sheet sections): with fewer than three teeth engaged, individual teeth hook into the material, snag and strip off. This is the classic cause of sudden tooth loss when cutting hollow sections.
- Too fine a pitch on solid material: the small gullets can’t clear the volume of chips being produced, so swarf packs into the gullets, the blade loads up, cutting rate collapses and heat builds.
Solid bar wants a coarser pitch; thin-walled tube and structural sections want a finer one. Variable-pitch blades (marked as a range, e.g. 4/6 or 6/10 TPI) are a sensible compromise for workshops cutting a mix of sections, because the varying tooth spacing also reduces the harmonic vibration that causes squeal and chatter.
If your workshop cuts everything from solid billet to thin tube on one saw, keep at least two blades on hand in different pitches and change them to suit the job. The five minutes it takes to swap a blade is cheaper than replacing one with the teeth torn off.
5. Don't Cut Dry: Lubricant and Coolant
A metal bandsaw blade generates serious heat at the tooth tip, and heat is what kills blades. Cutting lubricant does three jobs: it carries heat away, it reduces friction between the blade and the cut face, and it helps flush chips out of the gullets.
- Flood coolant systems (standard on most horizontal production saws) should deliver a steady, generous flow directed into the cut, not a dribble. Check the concentration of soluble oil regularly with a refractometer. Coolant that’s too lean loses its lubricity, while mix that’s too rich gums up the machine and costs money. Keep the tank clean; coolant loaded with fine swarf is abrasive slurry, not lubricant.
- Mist systems and lubricant sticks or pastes suit smaller machines and portable saws. They’re better than nothing by a wide margin, the worst option on steel is cutting completely dry.
- The exceptions: Cast iron is traditionally cut dry, and some materials have specific coolant requirements. Check before you cut anything unfamiliar.
One symptom worth knowing: if chips are welding themselves to the tooth tips (visible as material built up on the teeth), you have a lubrication problem, the wrong blade speed, or both. Address it before it tears teeth out.
6. Keep the Machine Serviced & Know when to Call it in
- Daily: clear swarf from the machine, wheel housings and guides; check coolant flow.
- Weekly: brush down the wheels, check blade tension, inspect the wire brush (chip brush) that cleans the blade and adjust it so it’s actually touching the teeth.
- Monthly: check guide condition and clearance, coolant concentration, vice squareness, and test the blade for square using a roller square against the blade at the guides.
- Annually, or on any persistent fault you can’t trace: a full professional service — wheel and bearing condition, drive train, hydraulics, gearbox oil, electrical checks and full geometric alignment.
The Quick Reference Checklist
When a bandsaw starts misbehaving, work through this sequence:
- Read the symptom – crooked cuts, stripped teeth, blue chips and squealing all point to different causes.
- Set tension and tracking to the manufacturer’s specification before touching anything else.
- Inspect the guides and replace worn pads or rollers – they’re consumables, not fit-and-forget parts.
- Match blade speed and feed rate to the material, and read the chips to confirm you’ve got it right.
- Check the blade pitch – minimum three teeth in the cut, always.
- Keep coolant flowing at the right concentration, and never cut steel dry.
- Service the machine on a schedule, and call in professional support when a fault won’t trace.
A metal bandsaw rewards small amounts of regular attention with years of accurate, low-cost cutting. And when a problem goes deeper than setup and adjustment, Power Machinery’s national service department is a phone call away.
When it's Time to Stop Fixing and Start Replacing
Sometimes the honest answer at the end of all this troubleshooting is that the saw itself is the problem. If you’re constantly re-tensioning, re-tracking and replacing blades on a machine that’s decades old, has worn wheel bearings and a downfeed that no longer regulates, you can reach the point where every hour of workshop time and every destroyed blade is money spent propping up a machine that will never cut accurately again. A saw that can’t hold its settings doesn’t just cost you consumables, it costs you rework, scrapped material and jobs that run late.
Power Machinery supplies a full range of metal cutting bandsaws built for Australian fabrication workshops, from compact manual machines through to semi-automatic and fully automatic production saws for high-volume cutting. Every machine we sell is backed by the same national in-house service department mentioned above. The team that commissions your new saw is the same team that supports it for its working life, anywhere in the country.
If you’re weighing up whether your current saw is worth another repair, talk to us. We’ll give you a straight answer, and if a new machine is the right call, we’ll help you match the saw, capacity and level of automation to the work actually going across your workshop floor. Get in touch or browse the bandsaw range to see what a saw that cuts square every time looks like.